Ai Thinker ESP-01S ESP8266 WiFi Module Original price was: ₹299.00.Current price is: ₹215.00.
Back to products
3 Channel RF Wireless ON/OFF Smart Switch with RF Remote Control Original price was: ₹699.00.Current price is: ₹525.00.

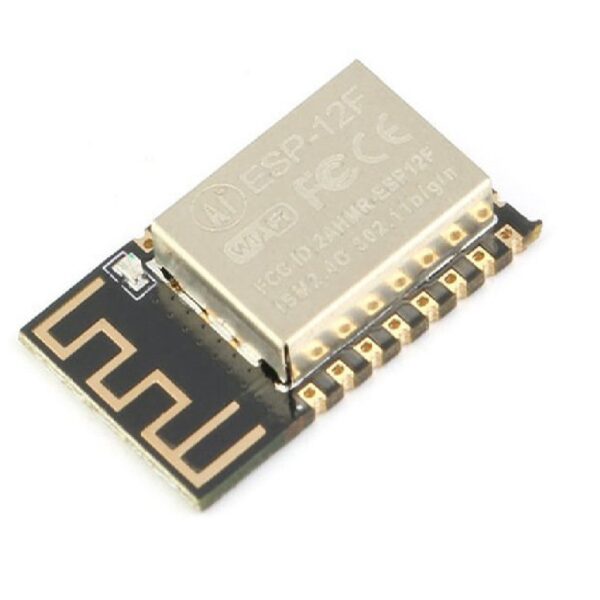
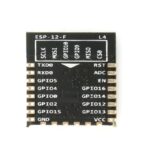
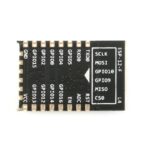
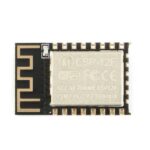
Ai Thinker ESP-12F ESP8266 Serial WiFi Module

  • Operating Voltage: 3.0-3.6V
  • 3DBi PCB-on-board antenna
  • Operating Current: 80mA
  • Low power 32-bit CPU, can also serve as the application processor
  • Up to 160MHz clock speed

IBOTS's 10th Anniversary Sale

Hurry and get discounts on all Raspberry Products up to 20%

IBOTS1000

Original price was: ₹250.00.Current price is: ₹179.00.

  • Pick up from the IBOTS Store

Free

  • Delivery Charges: Tamil Nadu

₹75 for parcels below 1 Kg and ₹100 for parcels weighing between 1 Kg to 2 Kg.

2-3 Days

₹75

  • Delivery Charges: Other South India

₹125 for parcels below 1 Kg and ₹175 for parcels weighing between 1 Kg to 2 Kg.

2-3 Days

₹125

  • Delivery Charges: North India

₹250 for parcels below 1 Kg and ₹325 for parcels weighing between 1 Kg to 2 Kg.

2-3 Days

₹250

  • Courier delivery

Our courier will deliver to the specified address

2-3 Days

Rs. 99

  • Warranty 1 year
  • Free Returns Policy

Payment Methods:

1. Order the Product and Specify the Delivery Method

2. You Will Receive an Order Confirmation Message

3. Wait for Your Order to Arrive

4. Pick up Your Order at The Checkout Area

Description

The Ai Thinker ESP-12F is a WiFi module based on the ESP8266 microcontroller, which is known for its robust performance and versatility in IoT (Internet of Things) applications. The ESP-12F is an enhanced version of the ESP-12 series, offering improved stability and antenna performance. Here’s an overview of the Ai Thinker ESP-12F ESP8266 Serial WiFi Module:

Key Features

  1. Microcontroller:
    • ESP8266: 32-bit Tensilica Xtensa LX106 microcontroller.
  2. Memory:
    • Flash Memory: 4MB.
    • SRAM: 64KB of instruction RAM and 96KB of data RAM.
  3. Wireless Connectivity:
    • WiFi: 802.11 b/g/n, supports WiFi Direct (P2P), soft-AP, and integrated TCP/IP protocol stack.
  4. Antenna:
    • Integrated high-performance PCB antenna for better signal strength.
  5. GPIO Pins:
    • 11 GPIO pins, capable of various functions including PWM, I2C, SPI, UART, and ADC.
  6. Interfaces:
    • UART: Universal Asynchronous Receiver/Transmitter.
    • SPI: Serial Peripheral Interface.
    • I2C: Inter-Integrated Circuit.
    • PWM: Pulse Width Modulation.
    • ADC: Analog to Digital Converter (10-bit resolution).
  7. Power Management:
    • Operating voltage: 3.0V to 3.6V.
    • Power consumption: Low power modes for battery-operated applications.
  8. Physical Dimensions:
    • Compact module, typically around 24mm x 16mm.

Pinout Description

The ESP-12F module has a number of pins that can be used for various functions:

  1. VCC: 3.3V power supply.
  2. GND: Ground.
  3. TX: UART Transmit.
  4. RX: UART Receive.
  5. CH_PD (EN): Chip enable (must be pulled high to enable the chip).
  6. GPIO0: General-purpose I/O pin.
  7. GPIO2: General-purpose I/O pin.
  8. GPIO4: General-purpose I/O pin.
  9. GPIO5: General-purpose I/O pin.
  10. GPIO12: General-purpose I/O pin.
  11. GPIO13: General-purpose I/O pin.
  12. GPIO14: General-purpose I/O pin.
  13. GPIO15: General-purpose I/O pin.
  14. GPIO16: General-purpose I/O pin.
  15. ADC (A0): Analog input pin (0-1V).

Common Applications

  • IoT Projects: Smart home devices, sensors, and actuators.
  • Home Automation: Control and monitor home appliances wirelessly.
  • Wireless Data Transmission: Send and receive data over WiFi.
  • Remote Control Systems: Operate devices from a distance via WiFi.
  • Embedded Systems: Add WiFi capability to existing microcontroller projects.

Getting Started

  1. Setup the Development Environment:
    • Arduino IDE: Install the ESP8266 board support via the Boards Manager.
    • Espressif SDK: For advanced development, use the ESP8266 SDK.
    • PlatformIO: Another option for development with comprehensive support for multiple platforms.
  2. Connecting the Module:
    • Use a USB-to-serial adapter to connect the ESP-12F to your computer.
    • Ensure proper voltage levels as the module operates at 3.3V.
  3. Flashing Firmware:
    • Write your code in the Arduino IDE or another supported IDE.
    • Select the “Generic ESP8266 Module” as the board in the Arduino IDE.
  4. Power Supply:
    • Ensure a stable 3.3V power source.
    • Do not exceed 3.6V to avoid damaging the module.

Tips

  • GPIO Handling: Be cautious with GPIO0, GPIO2, and GPIO15 during boot-up as they determine the boot mode.
  • Voltage Level: Use a voltage divider or level shifter for UART communication if using a 5V system.
  • Antenna Position: Keep the antenna area free from obstructions to ensure good signal strength.

Customer Reviews

0 reviews
0
0
0
0
0

There are no reviews yet.

Only logged in customers who have purchased this product may leave a review.