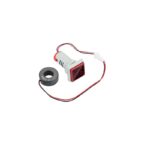
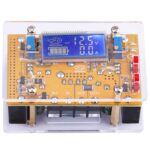
Dual Display 10A Power Adjustable Step-Down Constant-Voltage Constant-Current Power Module (With Case)
Calibration: The calibration function of this module takes care of the issue of erroneous measurements. Use the following calibration process if you notice that the measurement is wrong. Just utilising a calibrated one for the first time!
Voltage Calibration: Hold down the “set” key while the power is off. turn the device on and select the voltage calibration option. after which the LCD screen begins to blink. When the calibration reaches the proper input voltage, release the “set” key, press the “Set” button to increase, and press the “ENT” button to decrease. For instance, after adjusting the voltage to 12.65V, the input voltage was 12.65V. then after two seconds, it will automatically save, turn off, and the calibration is finished!
Special Instruction:
Some customers feedback that the output voltage of the module can not be adjusted When they just receive the item, this is because the module factory defaults output voltage at about 20V. When you encounter this problem. Please counterclockwise rotation ADJ-V potentiometer 10 laps or more, until the voltage value changes, then the module can properly adjust the voltage.
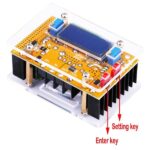
Setting Instruction:
Setting key to set the display node, has three types:
1, F-0 mode: Display output voltage:
2, F-1 node: Display input voltage:
3, F-2 mode: Alternating display input or output voltage
Instructions: Press the “SET” button to cycle through the three display modes, the corresponding indicator will be on or off, then press the “ENT” button to save and exit. if separate press the ‘ENT” button to switch the backlit LCD screen.
Using Instructions:
Adjusting Voltage: under no-load conditions, adjust the “constant voltage potentiometer ADJ-V”, so that the output voltage reaches the value you want: Adjustment Current: connected to the load, adjust the “constant current potentiometer ADJ-I”, so that the output current reaches the current value you want (the factory default is more than 2A, if you want to adjust the current value is small. more counter-clockwise tune laps will change), if you do not need constant current, it doesn’t need adjustment:
Indicator color change instruction: Charge turn lamp current factory default is 0.1 times the charging
current: battery during charging. the current is gradually reduced, gradually turned from the constant current charging to constant voltage charging, if the charging current setting is IA, then when the charge current is less than 0.1A. the charging yellow indicator light off, full of blue indicator lights up and the battery is fully charged.
Characteristics:
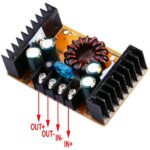
- Broad input voltage range of 10V to 32V; output voltage range of 10V to 60V; maximum output current of 8A; maximum output power of 150W
- The module has an LCD digital display with a delicate crystal shell that can display voltage and current on the complete screen. Its hollow form helps it dissipate heat.
- Up to 95% conversion efficiency and -40 to +85 degrees Celsius working temperature are achieved.
- Easy to use with a calibration feature and short-circuit protection, the shell floor features a fan aperture that allows you to install a fan to improve heat dissipation.
- Ideally suited for solar panels, wind turbines, direct drive LED lights, etc.


Reviews
Clear filtersThere are no reviews yet.